My Eureka Valley Narrow Gauge Railroad (EVNGR) is an On3 layout and has been developed over about 25 years – modified and expanded from time to time as we model railroaders are prone to do.
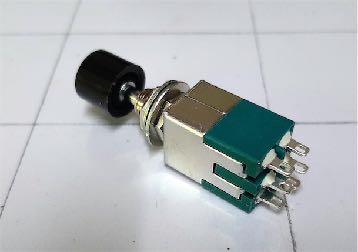
I started using Switchmaster motors for operating my turnouts and found them quiet, reliable, and relatively easy to install. To date, I’ve got 34 of these motors around the layout. Being a ‘constant on’ 12v motor, I wanted to use DPDT (constant on) push button switches to operate them. These simple – but somewhat tricky to wire – switches were located in the layout fascia in close proximity to the turnout that they controlled. The idea is that engineers can follow their trains around the layout using radio throttles (I’m using an EasyDCC system) and ‘throw’ the switches as required as their train approaches the turnout.
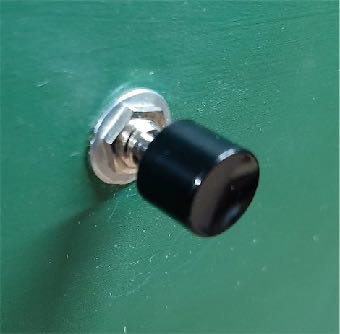
protruding from the fascia.
The thing that I was never quite happy with was that the push button switches protruded from the fascia 2 and occasionally a shirt, jumper, etc would get caught on a black button. Things came to a head recently when one of my operators recommended that a number of turnouts in the town of Eureka (set in a peninsula) really needed dual operating capability – meaning that the engineer could operate the turnouts from a (quite narrow) adjacent aisle – as well as from the existing setup. This aisle is a major choke point for operators and I did not want to have more black buttons protruding out into this aisle space. What to do?
recessed switches.
Fortunately, the wiring diagrams for recently purchased Switchmaster motors showed how a ‘remote’ push button switch could be connected to the existing motor.
Previously I’d bought all Switchmaster motors and the required DPDT switches from Builders-in-Scale in the USA. Knowing that in these COVID times mail deliveries between the USA and Australia had proved somewhat problematic, I searched for another (closer) supplier and found one in Singapore at www.monotaro.sg/g/1003667390.html.
Needless to say, I bought a few extra push buttons because the postage was as much as the cost of the switches!
So, back to the problem at hand – how to best recess the push button switches so that they were flush with the fascia and would not catch on operator clothing?
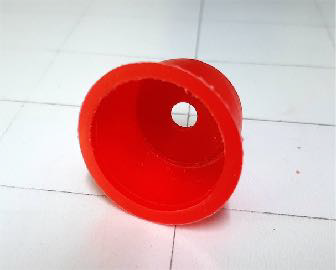
After a number of internet searches, I came across various plastic fittings called tapered plastic plugs – used to plug pipe ends – that might do the job. I contacted one supplier and was sent several sample plugs of the size that I thought would best meet my needs – and they did. However, when I went back to that supplier and asked for just 40 plugs, they wanted far too much for postage and shipping and would only supply a much larger quantity anyway. More internet searches later and I found a NSW supplier who would sell me a bag of 100 plugs of the required size 3 and I ordered them from www.stockcap.com.au Cost including delivery averaged about 40c/plug. The plugs arrived in about 4 days, which was pretty good, and they were a very close match size-wise to the original samples that I’d first received and tested.

The back of the plugs needed to be drilled with a 6 mm drill bit to make the hole to accommodate the push button switch. The plugs are a red plastic finish, so after drilling all of the plugs I sprayed them with a flat grey automotive primer as a base coat and let them dry overnight. I was able to find a spray can of Tamiya green which closely matched the dark green fascia colour on my layout and then gave the plugs their final coat, let them dry and the paint finish harden over a few days before installing them in the layout fascia.
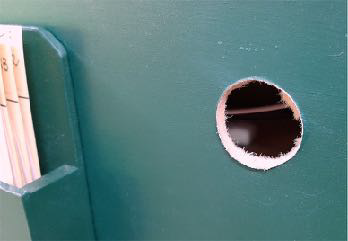
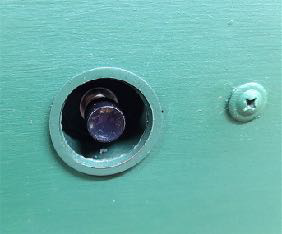
The installation process was relatively straightforward – remove the black cap, unscrew the existing push button switch, drill a 25 mm hole 4, fit the switch into the plug housing, and then push fit the plug (with switch installed) into the opening. The new plug housing is slightly flexible and I found that it was a tight push fit into the 25 mm fascia hole, 5 & 6, no glue or other fixing was needed.
So, with a little help from a friend, all push button switches have been recessed into the fascia and I’m happy with the much neater look and, of course, less opportunity to catch clothing as operators walk around the layout and navigate my relatively narrow aisles.